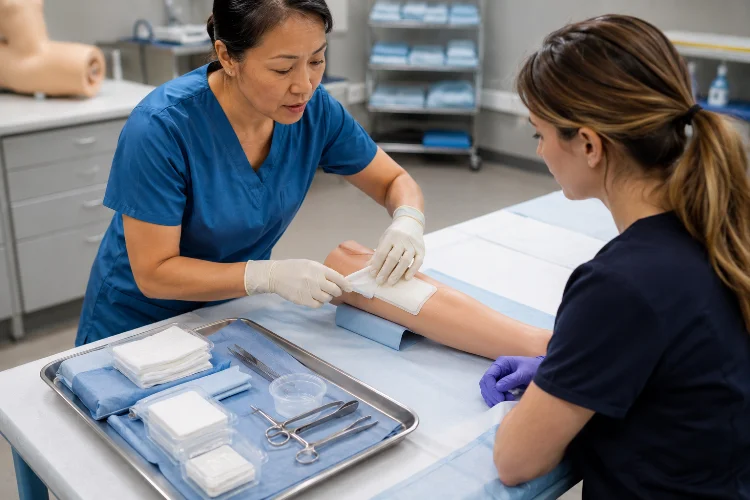
Watching an experienced clinician perform a procedure can make it look surprisingly simple. The hands move naturally, equipment appears in the right order, and important safety checks happen almost automatically.
For a learner seeing the skill for the first time, however, the same procedure may contain dozens of unfamiliar decisions.
That is why learning how to demonstrate clinical skills clearly and safely is such an important part of clinical education.
A good demonstration does more than show students what their hands should do. It explains preparation, patient communication, infection prevention, clinical reasoning, safety checks, and what to do when something does not go according to plan.
Structured teaching methods such as Peyton’s Four-Step Approach have been widely studied for teaching practical and procedural skills.
Whether you are teaching wound care, physical examination, medication administration, equipment use, or another practical skill, the goal is the same: make expert practice visible, understandable, and safe enough for the learner to reproduce.
Prepare Before You Start the Demonstration
Effective clinical skills teaching begins before anyone touches the equipment.
First, decide exactly what you want the learner to achieve. Are they simply observing a new procedure, learning the sequence, practicing one difficult component, or preparing to perform the entire skill under supervision?
The answer changes how you should teach.
Check that the required equipment is available and that the environment is appropriate. If the demonstration involves a real patient, consider privacy, comfort, consent, clinical condition, and whether the learner’s involvement is suitable.
Patient safety should always take priority over the teaching opportunity. Guidance for clinical placements emphasizes that students must learn within environments where patient safety remains the primary concern.
It also helps to assess the learner briefly.
Ask, “Have you done this before?” and “Which part are you least confident about?”
A student performing the procedure for the tenth time does not need the same explanation as someone seeing it for the first time.
Show the Whole Skill Before Breaking It Down
One useful approach is to let learners first see what competent performance actually looks like.
This is the first stage of Peyton’s Four-Step Approach. The educator demonstrates the complete procedure at a normal pace without constantly stopping to explain every movement.
The learner gets an overall picture of the skill before studying its individual components.
Imagine teaching a clinical examination.
If you interrupt after every movement with a five-minute explanation, the learner may understand individual steps but struggle to see how the entire examination flows.
A complete demonstration answers a different question:
“What should this skill look like when it is performed smoothly?”
After learners have seen the complete procedure, you can slow things down and explain it in detail.
This whole-part-whole style can make complex procedures easier to understand because students first see the destination before examining how to get there.
Break the Procedure Into Clear, Logical Steps
The second demonstration should be slower.
Now explain what you are doing.
Instead of simply performing hand hygiene, preparing equipment, positioning the patient, completing the procedure, and documenting the result, explain why each step matters.
For example:
“I’m checking all the equipment before starting because I don’t want to interrupt the procedure once the patient is positioned.”
That explanation helps learners understand the reasoning behind the behavior.
Make invisible decisions visible
Experienced clinicians often perform important mental checks automatically.
A learner cannot see those thoughts unless you verbalize them.
You might say:
“Before continuing, I’m checking whether the patient is experiencing pain.”
Or:
“This finding is different from what I expected, so I’m going to reassess before moving to the next step.”
This think-aloud approach helps learners see that clinical skills are not simply sequences of physical movements. They involve observation, decision-making, communication, and adaptation.
Try not to overload the demonstration with every possible fact. Focus on information that affects safe and competent performance.
Build Safety Into Every Step
Safety should not be something you mention at the end of the demonstration.
It should be visible throughout it.
Show the learner exactly when hand hygiene occurs, when personal protective equipment is needed, how equipment is handled, how patient identity is checked, and what precautions apply to the procedure.
CDC Standard Precautions include hand hygiene and appropriate use of personal protective equipment when exposure to infectious material is anticipated.
Just as importantly, explain what would make you stop.
For example:
“If the patient suddenly becomes dizzy, I would pause the procedure, make sure they are safe, and reassess.”
Or:
“If I notice that the sterile field has been contaminated, I don’t continue and hope for the best. I correct the problem before proceeding.”
These moments teach an important professional lesson: completing the procedure is never more important than completing it safely.
WHO’s patient safety curriculum similarly emphasizes incorporating safety principles into health professionals’ education rather than treating patient safety as an isolated subject.
Let the Learner Explain the Skill Back to You
One of the most useful stages of Peyton’s approach happens before the learner performs the skill independently.
Ask the learner to talk you through it.
The learner explains what should happen next while the educator performs the actions.
For example:
“What should I do before touching the equipment?”
“Where should the patient be positioned?”
“What safety check comes next?”
This is very different from asking, “Do you understand?”
Most learners will say yes to that question, even when their understanding is incomplete.
Explaining the sequence forces learners to organize what they have observed into a coherent process. Peyton’s method describes this stage as comprehension, followed by the learner’s own performance of the procedure.
If the student misses a step, you can correct the misunderstanding before they begin hands-on practice.
Use Return Demonstration and Appropriate Supervision
Eventually, the learner needs to do the skill.
Watching demonstrations is useful, but clinical competence develops through practice.
Ask the learner to perform the procedure while explaining important actions or decisions. Stay close enough to intervene if safety becomes a concern, but avoid taking over every time the learner hesitates.
The level of supervision should match the learner’s competence, the complexity of the task, patient circumstances, and relevant professional or organizational requirements.
NMC standards, for example, require appropriate supervision that supports learning while maintaining public protection.
With beginners, you may provide frequent prompts.
With more experienced learners, allow greater independence before stepping in.
If a mistake would create immediate risk, intervene immediately. If it is a harmless sequencing issue, you may be able to let the learner finish before discussing it.
That distinction prevents over-supervision while still protecting patients.
Practice Difficult Skills Away From Patients When Possible
Not every first attempt needs to happen with a real patient.
Simulation, task trainers, skills laboratories, and structured practice can give learners opportunities to make mistakes, repeat difficult steps, and build confidence before performing procedures in clinical care.
AHRQ notes that healthcare simulation can help clinicians practice and improve knowledge, skills, and behaviors before treating patients.
This is especially valuable for uncommon, complex, or higher-risk procedures.
Repetition also matters.
Research on deliberate practice in clinical education emphasizes focused repetition combined with assessment and feedback rather than simply repeating a task without direction.
If a learner struggles with one specific component, you do not necessarily need to repeat the entire procedure ten times.
Focus practice on the difficult part, provide feedback, and then reintegrate it into the full skill.
Give Specific Feedback After the Performance
Once the learner finishes, avoid limiting your feedback to:
“Good job.”
Positive encouragement is useful, but learners also need to know exactly what they did well.
Try:
“You maintained your clean technique consistently and explained the procedure clearly to the patient.”
Then identify one or two areas for improvement.
“For the next attempt, organize your equipment before positioning the patient. You had to stop halfway through to find an item, which interrupted the flow.”
That feedback is specific and actionable.
It also helps to ask for self-assessment first:
“How do you think that went?”
“What felt easiest?”
“Which part would you change next time?”
Learners often identify their own difficulties. Their answers also show whether they can accurately evaluate their performance.
Keep feedback focused. Giving someone fifteen corrections after their first attempt can make it difficult to remember any of them.
Teach Learners What to Do When Things Go Wrong
Textbook demonstrations often happen perfectly.
Real clinical practice does not.
Equipment fails. Patients move. Results are unexpected. Sterile technique is accidentally broken. A procedure that normally works easily suddenly becomes difficult.
Include these situations in your teaching.
Ask:
“What would you do if this happened?”
Discuss when the learner should stop, seek assistance, repeat an assessment, replace equipment, escalate a concern, or choose another approach.
This teaches flexibility rather than mechanical imitation.
A learner who only memorizes the “perfect” sequence may become stuck as soon as the situation changes. Someone who understands the principles behind the skill is much better prepared to adapt while maintaining safety.
Knowing how to demonstrate clinical skills clearly and safely means doing more than performing a procedure while a learner watches.
Effective educators prepare carefully, demonstrate the whole skill, break it into understandable steps, verbalize important reasoning, model safety practices, and then give learners opportunities for supervised practice.
Methods such as Peyton’s Four-Step Approach provide a useful structure, while simulation, deliberate practice, and focused feedback can strengthen skill development before learners work more independently.
Most importantly, teach the principles behind the procedure-not just the movements.
The next time you demonstrate a clinical skill, ask yourself what an inexperienced learner cannot see in your expert performance. Slow those moments down, explain your reasoning, and give the learner a safe opportunity to practice it back.